Anping County Zhongqian Construction Material Technology Co.,Ltd.
You are here: Home » Products » Chain Link Fence » PVC Chain Link Fence
PRODUCTS

Categories

Search Products

loading

Share to:
sharethis sharing button

PVC Chain Link Fence

  • US $1.5 - 3/Square Meter

  • 1000 Square Meter/Square Meters

  • 1000,00 Square Meter/Square Meters per Month

  • Tianjin

  • T/T, LC, D/A, D/P, O/A

Availability:
Quantity:

PVC-Coated-Chain-Link-Fence.pdf

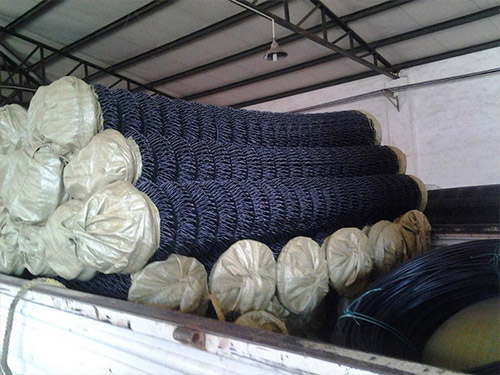
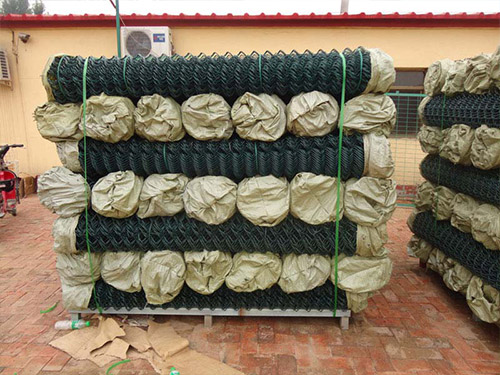
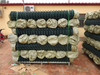
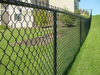
Attractive, versatile and creative - PVC coated chain-link fencing can be an excellent choice. With the right fence you can expect years of protection, privacy and value. PVC chain-link fencing comes in a wide range of qualities, colors, sizes and types.

Material:
PVC coated wire, core of it can be electro galvanized iron wire, hot-dipped galvanized iron wire or black annealed iron wire.

Processing: 
PVC coated or painting after weaving of steel wire Weaving of steel wire after PVC coated or painting.

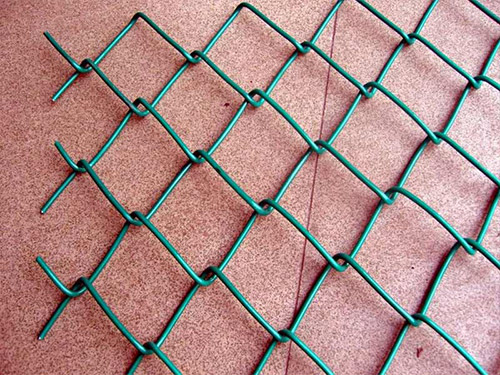
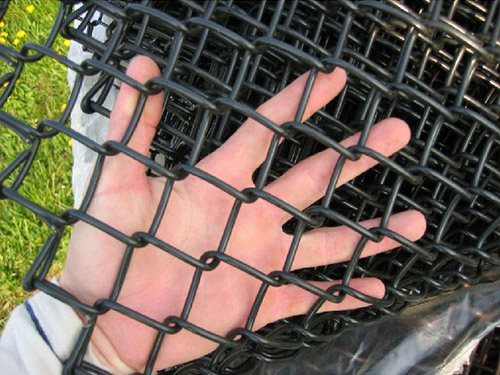
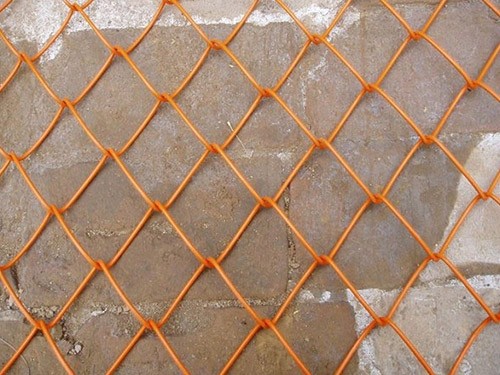
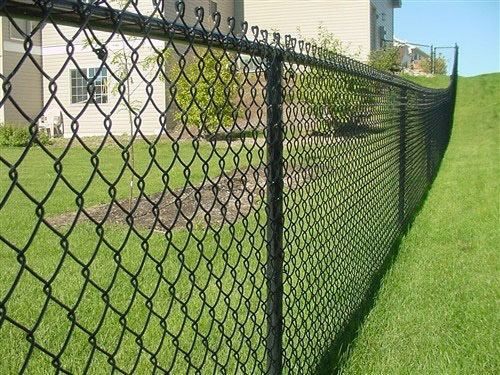
Colors: For coated there are many beautiful colours to choice, such as light green, dark green, yellow and black.

color

Features:

PVC Coated Chain link Fence enjoy such properties as corrosion resistance, aging resistance, sunshine resistance and weather resistance.

Chain Link Fence Edges:
1.Knuckle-Knuckle
The wire is knuckle at both ends and is abbreviated as(KK).
2.The wire is knuckle at the bottom and twisted into a barbed selvage at the top and is abbreviated as(KB).
3.The wire is twisted into a barbed selvage at both ends and is abbreviated as(BB).

Chain Link Fence Edges

Chain link fence Fittings and installation:

A.Flat iron:support chain link fence
B.Brace band:link tensioner post
C.Tension band Link the flat iron post
D.Tensioner:secure wire
E.Line wire:Folding the chain link mesh
F.Tie wire and Stirrup wire:secure the line wire and secure the post and the mesh
G:Barbed arm for barbed wire

Application:

1) As fences for playground, gardens, highway, railway, airport, residence, etc.
2) Frame chain link fence is also used in breeding of animals.
Characteristics:good corrosion resistance, sunshine resistance, anti-oxidation;easy to install and transport;economical and practical.

B.Barbed Wire Size:
Wire dia:12#*14# ;14#*14# ;14#*16# double strands wire with hot dipped galvanized finishing

C.Post Size:
Angle steel post :30*30*2.5mm ;35*35*3.0mm ;45*45*4.0mm etc
Pipe :OD48mm pipe ;OD60mm pipe
All post surface treatment usually is galvanized (Electro galvanized or hot dipped galvanized)

Chain link fence weaving and characteristics
1.uniform mesh,flat surface,high quality
2.Simple weaving,wide banner 
3.Galvanizing after welding, galvanizing before welding
4.Thicker wire diameter, practical
5.It is easy to work,bright color, easy to maintain.
6.Difficult to corrosion, long life expectancy
7.Chain link fence netting are the first choose for beautifying the city environment.

Special specifications can be produced by the customer's requirements.

Opening

Wire Gauge

Wire Diameter

Weight

inch

mm

(SWG)

(mm)

(kg/m2)

1/2"

12.7

14#

2.2

4.4

3/4"

19.05

12#

2.8

6

3/4"

19.05

14#

2.2

3.3

3/4"

19.05

16#

1.63

1.9

1"

25.4

12#

2.8

4

1"

25.4

14#

2.2

2.4

1"

25.4

16#

1.83

1.4

1.1/4"

31.75

12#

2.8

3.2

1.1/4"

31.75

14#

2.2

1.92

1.1/2"

38.1

10#

3.25

4.1

1.1/2"

38.1

12#

2.8

2.7

1.1/2"

38.1

14#

2.2

1.6

2"

50.8

8#

4.06

4.6

2"

50.8

10#

3.25

3.1

2"

50.8

11#

2.95

2.5

2"

50.8

12#

2.8

2

1

process

Accessories

Accessories1

How to Install Chain Link Fence?
Useful tools for installing chain link fence 
Tape Measure
Level
Pliers
Wire Cutters
Sledge Hammer
Post Hole Digger
Wheelbarrow, Shovel and Hoe to Mix and Transport Concrete
Hacksaw or Post Cutter
String / Mason Line and Stakes
Crescent Wrench
Fence Stretcher (ratchet type power pull, block and tackle, or similar device may be used. Most wire stretching tools can be borrowed or locally rented.)

Materials Needed for Residential Chain Link Fence

DESCRIPTION

Picture

QUANTITY TO USE

Fence Fabric

1

Usually sold in rolls of 50 feet

Top Rail

2

Total footage of fence less gate openings

Line Posts (intermediate posts)

3

Divide total footage by 10 and round up (see chart below)

Terminal Posts (end, corner, and gate posts) (usually larger than line posts)

3

As required (2 for each gate)

Top Rail Sleeve

4

1 for each length of plain top rail. Not required for swedged top rail

Loop Caps

5

Use 1 per line post (two styles shown left)

Tension Bar

6

Use 1 for each end or gate post, 2 for each corner post

Brace Band

7

Use 1 per tension bar (holds rail end in place)

Rail Ends

8

Use 1 per tension bar

Tension Band

9

Use 4 per tension bar or 1 per foot of fence height

Carriage Bolts 5/16" x 1 1/4"

10

Use 1 per tension or brace band

Post Cap

11

Use 1 for each terminal post

Fence Tie / Hook Ties

12

1 for every 12" of line posts and 1 for every 24" of top rail

Walk Gate

13


Double Drive Gate

14


Male Hinge / Post Hinge

15

2 per single walk gates and 4 per double drive gate

Carriage Bolts 3/8" x 3"

10

1 per male hinge

Female Hinge / Gate Hinge 16 2 per single walk gates and 4 per double drive gate
Carriage Bolt 3/8" x 1 3/4" 10 1 per female hinge
Fork Latch 17 1 per walk gate


Step 1 - Survey Property Lines
Be sure that the fence does not exceed property lines. Most fence installers recommend that all posts be set approximately 4" inside the property line. This will help avoid encroaching on adjoining property with concrete footings. This is easily done by stretching a string along the property line and setting the posts 4" inside. 

Step 2 - Locate and set Terminal Posts (corner, end, and gate posts are called terminal posts)
Distance between gate posts is determined by adding the actual width of the gate plus an allowance for hinges and latches. Usually walk gates require 3 3/4" for hinges and latches and double drive gates require 5 1/2". Next, dig the holes.
Terminal posts should be set 2" higher than the height of the fence fabric and line posts 2" lower than the height of the fence fabric (terminal posts should be 4" higher than the line posts). Set the terminal posts in concrete using a concrete mix. You can use 1 part cement, 2 parts sand, and 4 parts gravel. There is also pre-mix cement. Use a level to make sure the posts are straight. Posts should be centered in the hole. Crown posts footings so the water will drain away from the posts.

Step 3 - Locate and set Line Posts
After the concrete around the terminal posts have hardened, stretch a string tight between the terminal posts. The string should be 4" below the top of the terminal posts. Line posts should not be spaced more than 10 feet apart. For example, if the length between two terminal posts is 30 feet, then line posts would be spaced 10 feet apart (see chart below).
Line Post Spacing Chart

Space Between Terminal Posts

Set Line Posts Apart


Space Between Terminal Posts

Set Line Posts Apart

30 ft

10 ft

76 ft

9 ft 6 in

31 ft

7 ft 9 in

77 ft

9 ft 7 in

32 ft

8 ft

78 ft

9 ft 9 in

33 ft

8 ft 3 in

79 ft

9 ft 10 in

34 ft

8 ft 6 in

80 ft

10 ft

35 ft

8 ft 9 in

81 ft

9 ft

36 ft

9 ft

82 ft

9 ft 1 in

37 ft

9 ft 3 in

83 ft

9 ft 3 in

38 ft

9 ft 6 in

84 ft

9 ft 4 in

39 ft

9 ft 9 in

85 ft

9 ft 6 in

40 ft

10 ft

86 ft

9 ft 7 in

41 ft

8 ft 2 in

87 ft

9 ft 8 in

42 ft

8  ft 5 in

88 ft

9 ft 9 in

43 ft

8  ft 6 in

89 ft

9 ft 10 in

44 ft

8 ft 9 in

90 ft

9 ft

45 ft

9 ft

91 ft

9 ft 2 in

46 ft

9 ft 2 in

92 ft

9 ft 2 in

47 ft

9 ft 5 in

93 ft

9 ft 3 in

48 ft

9 ft 7 in

94 ft

9 ft 5 in

49 ft

9 ft 9 in

95 ft

9 ft 6 in

50 ft

10 ft

96 ft

9  ft 7 in

51 ft

8 ft 6 in

97 ft

9  ft 7 in

52 ft

8 ft 8 in

98 ft

9  ft 8 in

53 ft

8 ft 10 in

99 ft

9  ft 9 in

54 ft

9 ft

100 ft

10  ft

55 ft

8 ft 2 in

101 ft

9  ft 2 in

56 ft

9 ft 4 in

102 ft

9  ft 3 in

57 ft

9 ft 6 in

103 ft

9  ft 4 in

58 ft

9 ft 8 in

104 ft

9  ft 5 in

59 ft

9 ft 10 in

105 ft

9  ft 6 in

60 ft

10 ft

106 ft

9  ft 7 in

61 ft

8 ft 8 in

107 ft

9  ft 8 in

62 ft

8 ft 10 in

108 ft

9  ft 9 in

63 ft

9 ft

109 ft

9  ft 10 in

64 ft

9 ft

110 ft

10 ft

65 ft

9 ft 3 in

111 ft

9  ft 3 in

66 ft

9 ft 5 in

112 ft

9  ft 4 in

67 ft

9 ft 7 in

113 ft

9  ft 5 in

68 ft

9 ft 8 in

114 ft

9  ft 6 in

69 ft

9 ft 10 in

115 ft

9  ft 7 in

70 ft

10 ft

116 ft

9  ft 8 in

71 ft

8 ft 9 in

117 ft

9  ft 9 in

72 ft

9 ft

118 ft

9  ft 10 in

73 ft

9 ft 2 in

119 ft

9  ft 10 in

74 ft

9 ft 3 in

120 ft

10 ft

75 ft

9 ft 4 in

121 ft

9  ft 3 in

Dig the post holes and set the line posts. Before concrete begins to set, adjust post height by moving post up or down. Top of the line posts should be even with the string. Check with level to make sure posts are straight.

Step 4 - Apply Fittings to Terminal Posts
Check material list and fittings chart above. After all posts have been installed and the concrete footings have hardened, slip the tension and brace bands onto the terminal posts. The long flat surface of the tension band should face towards the outside of the fence. Take care not to spread or distort the fittings. Now apply terminal post caps. 

Step 5 - Apply Top Rail
Attach loop caps to line posts. Insert one length of top rail Post through the eye-top closest to one of the terminal post. Slide a rail end onto the end of the top rail and attach it to a termianl post by using the brace band (If using swedge top rail, do not insert the swedged end into the rail end). Secure the rail end to the brace band with a carriage bolt. Continue by attaching top rails together. If swedged top rail is not used, you'll connect the rail ends together by using top rail sleeve. Upon reaching the other terminal post, measure carefully and cut the top rail to fit tightly into the rail end. Secure rail end to the terminal post with brace band and carriage bolt. 

Step 6 - Hang Chain Link Fabric
Unroll the chain link fabric on the ground along the fence line. Slide tension bar through the last link on the chain link fabric. Stand the fabric up and lay it against the posts. Fasten the tension bar (that you just inserted) to the terminal post with tension bands (already on the post). Use the carriage bolts with the head to the outside of the fence. Walk along the fence and take the slack out. Loosely attach fabric to top rail with a few wire ties. 
To connect two sections or rolls of fence fabric together - take a single strand of wire from one of the sections of fence (Sometimes it is necessary to remove a second wire on the one end in order for the two sections to mesh properly.). Place the two section of fence next to each other (end on end). Join the two sections by winding (corkscrew fashion) the loose strand down through the fence. Join and tighten the knuckles at bottom and top. Now you shouldn't even be able to see where the two sections were connection together. 
To remove excess chain link fence fabric - untie both top and bottom ends of fence (knuckles - pliers shown below). Twist the wire in a corkscrew fashion until the fence comes apart. One picket shown in red is turned until the fence is separated.

1

Step 7 - Stretch Chain Link Fabric

Fabric should already be fastened to the opposite end of the fence. Insert a tension bar (may need an extra one) approximately 3 feet inside the unattached end of the fabric. Securely fasten one end of the fence stretcher to the tension bar and the other end to the terminal post. Stretch the fabric - the correct tension should allow a slight amount of give when squeezed by hand. The top of the fabric should be located approximately 1/2" above top rail. Adjust fabric to exact length by adding or removing wire as mentioned in step 6. Insert a tension bar at the end of the fabric and connect tension bands on terminal post. Remove fence stretcher. Attach wire ties to top rail 24" apart. Attach wire ties to posts 12" apart. Tighten nuts on all brace and tension bands.

Step 8 - Hanging Gates
After the fence has been completed, install the male hinges to one of the gate posts, hanging the top hinge with pin pointing down and the bottom hinge with the pin pointing up. This will prevent the gate from being lifted off. Set gate in place, aligning top of the gate with the top of fence. Adjust and tighten hinges to allow for full swing. Install gate latch for single gates. Double gates use the same procedure but install center latching device (fork latch).

Notes: Post depth can be determined by local weather and soil conditions, terminal posts are normally dug 10" wide and 18" to 30" deep. Depending on the wind and soil conditions you may want to use 8' centers or even a more narrow spacing for line posts. You may want to use longer line or terminal posts depending on the wind and soil conditions in your area. If you want to add privacy slats in the future, make sure the frame work will be strong enough for additional wind load.


Packaging

Previous: 
Next: